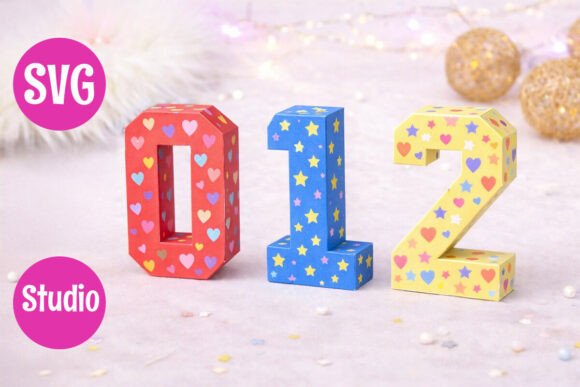
3D Numbers Set 0–9
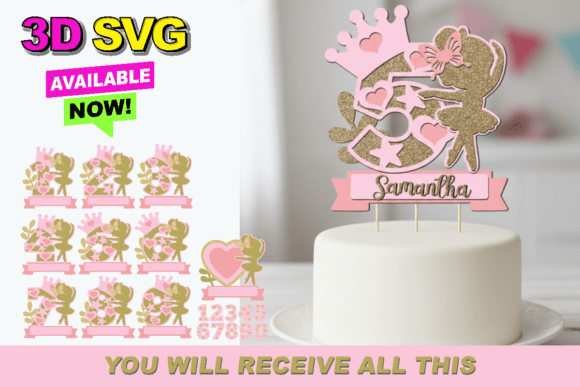
Creating a memorable visual display for a birthday, anniversary, or educational event often requires more than just flat text. While standard paper cutouts serve their purpose, they lack the tactile depth that makes a project feel professional and polished. This is where the 3D Numbers Set 0–9 becomes an essential tool for crafters, educators, and small business owners alike. By utilizing layered SVG files designed specifically for cutting machines like Cricut and Silhouette, you can transform simple cardstock into sturdy, eye-catching dimensional displays.
However, moving from a digital file to a physical 3D object involves more than just pressing "cut." Many users overlook the technical nuances of layering, alignment, and material selection, leading to projects that look messy or fall apart. Understanding these pitfalls before you start your first cut can save you time, materials, and frustration.
Understanding the Value of Layered Digital Assets
The primary advantage of using a dedicated 3D Numbers Set 0–9 is precision. Unlike free generic clip art, which often features inconsistent line weights or poorly optimized paths, this collection is engineered for clean layers and precise alignment. Each number is broken down into distinct strata that stack together to create volume without requiring complex folding techniques.
This approach is particularly beneficial for:
- Birthday Decorations: Creating large, freestanding numbers that anchor party themes.
- Educational Projects: Helping children visualize numerical concepts through tactile learning aids.
- Event Signage: Adding impact to wedding backdrops, baby showers, or corporate milestones.
- Social Media Content: Crafting high-quality props for photography that stand out on feeds.
Because the files are provided in multiple formats—including SVG for universal compatibility and Studio files specifically for Silhouette users—you gain flexibility in how you edit and prepare your designs. This versatility ensures that whether you are a beginner using basic settings or a pro customizing colors and sizes, the core geometry remains intact.
Common Mistakes in 3D Paper Craft Assembly
Even with high-quality assets, execution matters. Here are the most frequent errors that compromise the final result, along with practical advice on how to avoid them.
Ignoring Material Thickness and Tolerance
One of the biggest misconceptions among beginners is assuming that all cardstock behaves the same way. The design of the 3D Numbers Set 0–9 accounts for specific layer gaps, but if you switch from lightweight 65lb cardstock to heavy 110lb cover stock without adjusting your machine settings or adhesive strategy, the numbers may not fit together snugly. Thick paper reduces the internal space between layers, causing the structure to bulge or warp.
Correction: Stick to medium-weight cardstock (around 80–100lb) for the best balance of durability and ease of assembly. If you must use thicker paper, test a single digit first to ensure the layers slide together smoothly without forcing the glue points apart.
Overlooking Alignment Marks
Precision is the difference between a wobbly mess and a sleek geometric shape. The layers in this set are designed to interlock based on specific edge alignments. A common mistake is rushing the weeding process or failing to align the cut pieces perfectly before gluing. Even a millimeter of deviation in one layer can compound across the height of the number, resulting in a tilted or uneven final product.
Correction: Use a bone folder or a sharp tool to lift the edges of each layer carefully. When assembling, place the bottom layer on a flat surface and stack subsequent layers one by one, checking alignment at every step. Do not apply full adhesive until you are confident the stack is straight.
Misunderstanding File Compatibility
While the package includes both SVG and Studio files, not all software handles vector data identically. Some users attempt to open Silhouette Studio files in Cricut Design Space without converting them, or vice versa, leading to missing elements or distorted shapes. Additionally, relying solely on the preview window in your software can be deceptive; what looks correct on screen might have overlapping paths that confuse the cutting blade.
Correction: Always import the appropriate file type for your machine. If using Cricut Design Space, stick to the SVG files. If using Silhouette Studio, utilize the native .studio files for easier editing. Before cutting, zoom in on your digital canvas to check for any unintended overlaps or duplicate lines.
Maximizing Efficiency and Quality
To get the most out of your 3D Numbers Set 0–9, consider adopting a systematic workflow. Preparation is key to avoiding the waste associated with trial-and-error crafting.
- Select Your Base Color: Choose a color palette that complements your event theme. Solid colors often work best for 3D effects, as patterns can distract from the geometric structure.
- Calibrate Your Machine: Ensure your cutting mat is clean and your blades are sharp. Dull blades can tear delicate inner layers, ruining the structural integrity of the number.
- Weed with Care: Use tweezers to remove excess vinyl or paper from the intricate inner layers. Rushing this step can cause small pieces to detach prematurely.
- Use the Right Adhesive: For paper crafts, a fine-tip glue bottle or double-sided tape dots offer the most control. Avoid liquid glues that can warp thin paper layers.
By following these steps, you ensure that the final product is not only visually striking but also durable enough to last through the duration of your event or display period.
What to Check Before You Download
Before purchasing or downloading the 3D Numbers Set 0–9, it is wise to verify a few technical details to ensure the asset meets your specific needs.
First, confirm that your cutting machine supports the scale you intend to use. While the numbers are scalable, extremely large sizes may require additional support structures or heavier materials to remain freestanding. Second, review the included file list. The ZIP archive contains everything you need: the SVGs for general use and the Studio files for Silhouette enthusiasts. Having both ensures you are never locked into a single ecosystem.
Finally, remember that this is a digital product. There will be no physical shipment, and the files are intended for personal or commercial use depending on the license terms provided. Understanding these boundaries helps manage expectations and ensures you are using the resource responsibly.
Conclusion
The 3D Numbers Set 0–9 offers a robust solution for anyone looking to elevate their paper crafts with dimensional appeal. By avoiding common pitfalls related to material choice, alignment, and software compatibility, you can produce professional-grade results that impress guests and clients alike. Whether you are designing a whimsical birthday banner or a serious educational tool, this set provides the foundation for creativity and precision. Take the time to prepare properly, and your 3D numbers will stand tall—literally and figuratively.